10/20/2016
electronic business card | pt. 4
I ordered PCBs last month from two places. Seeedstudio and DirtyPCBs. I've wanted to try these services for a while, and I thought this would be a good test of their capabilities. I placed both orders on the same day, and both orders came to about $75. However, I recieved less boards from DirtyPCBs. Both arrived in the mail on the same day. Although the price on the DirtyPCB boards were slightly higher per board, I would probably order from them next time. The soldermask on the Seeedstudio boards was slighly thinner (and some boards had exposed copper on some traces), and the PCB identification was placed in silkscreen right on the front of the card. The DirtyPCB board had a much more discrete barcode that was laser etched onto the back of the card along the bottom of the board, which was very difficult for me to spot. I hate putting a lot of time into the design of a board for it to be adulturated with some silkscreen from the fabrication house.
Here's all of the boards I got. I couldn't be happier.

Here's a closeup of how the buttons and batteries fit into the board.
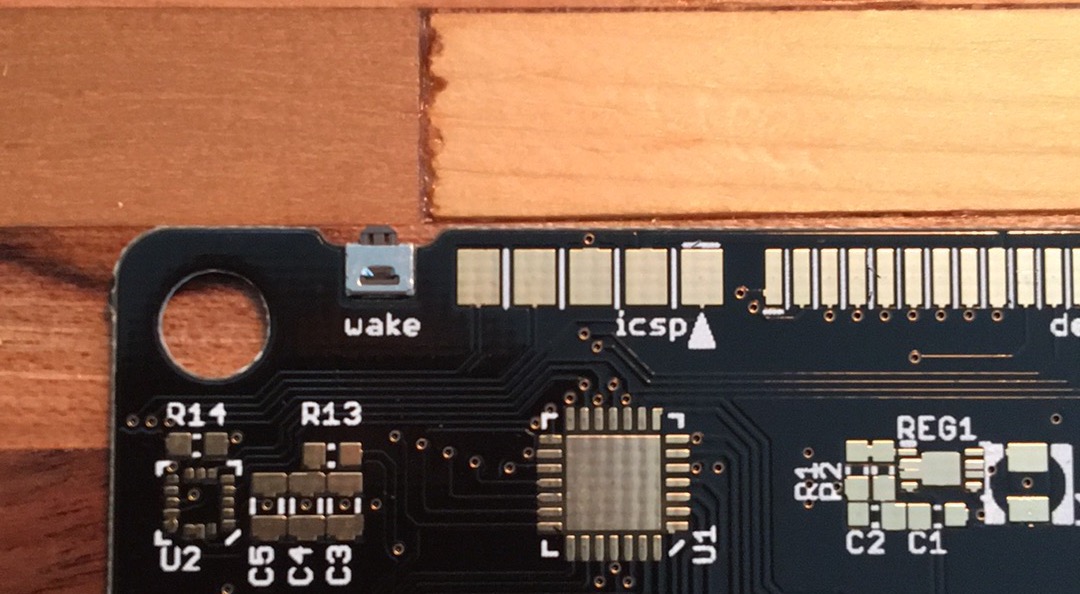

Here's one of the boards from DirtyPCBs, note the lack of the silkscreen identification text on the front.

I ordered a piece of stainless steel from McMaster-Carr and cut the outline and holes out of the steel front piece. -- There was some operator error with the waterjet which caused an accidental crash of the cutting nozzle into the metal. I was instructed incorrectly on what to do when the waterjet software prompted to perform a calibration of the 5-axis nozzle (this allows the machine to cut on surfaces that aren't parallel with the cutting bed). After the calibration was finished, we assumed that the reference "home" position was unchanged and told the machine to perform the cuts. However, the calibration process modifies the machine's reference position. The machine jogs to the home position before starting a cut, which caused the nozzle to move vertically into my piece of metal, leaving it slightly bent, which I didn't notice at first.
When the machine was inspected and re-homed, the cut was made. However, since the piece of metal was slightly bent, the cuts were slightly distored. Which is okay for now. It's a bit of a difficult process to get time on the waterjet, so I'll have to come back another time.
Here's how the steel piece fits over the PCB. Very happy how everything lines up.
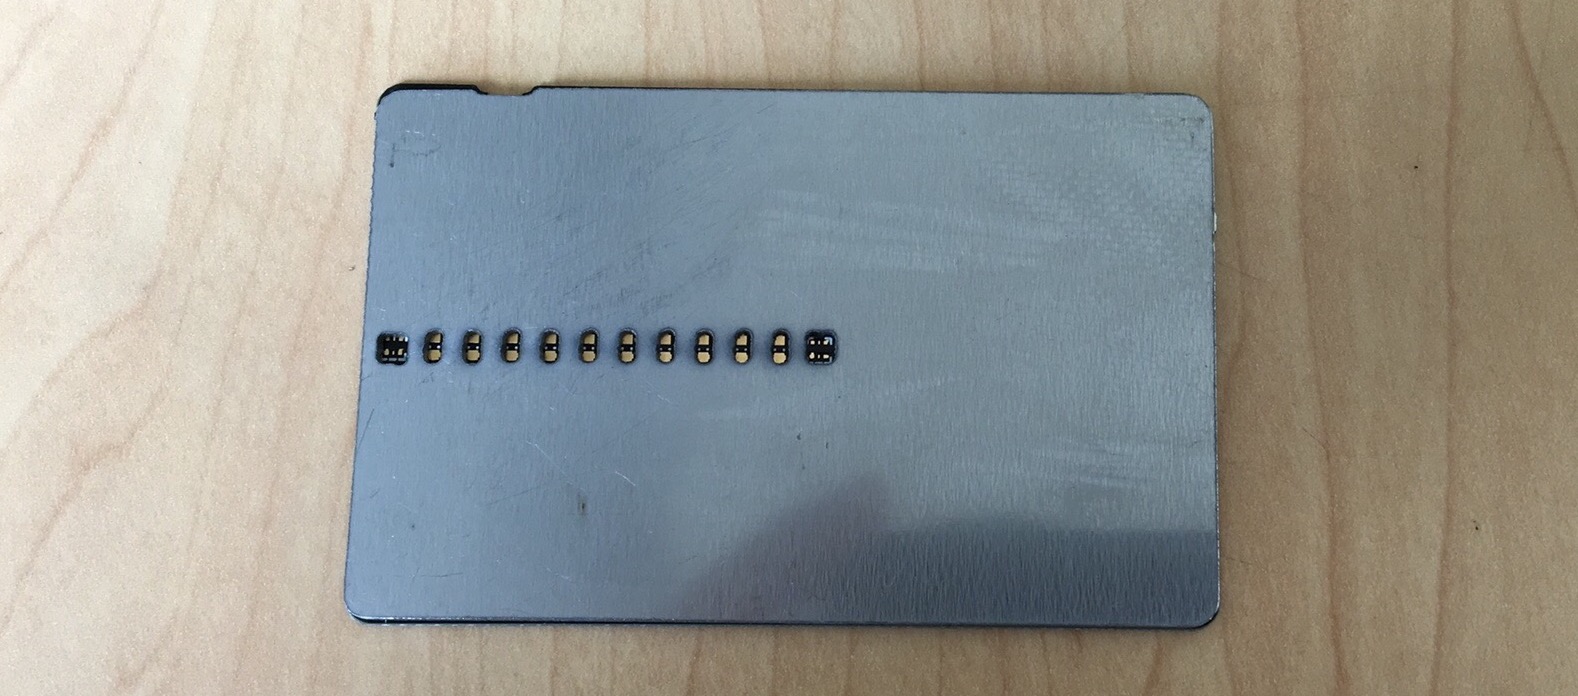
The magnets fit perfectly into the holes in the PCB. Here's a video of the PCB snapping onto the steel piece.
I've ordered a very small endmill to do all of the pockets in the steel piece, but since this piece was already not perfect I thought I'd try and see what I could do with a larger endmill. I was very curious if I was going to be able to mill into the thin piece of metal as far as I needed to. I took a series of cuts, cutting deeper into the material each time. I was getting very excited as the DRO was reading that I had cut about 40 thou deep into my 48 thou thick piece of metal. I took the part out of the mill and my excitement was ruined very quickly as I turned the piece of metal over to find a "bubble" of metal sticking up above the rear surface.

It's pretty clear that as the wall thickness became smaller the rear wall was bent out of the way of the endmill instead of being cut by the endmill. I'm not sure if this can be solved using a sharper and smaller endmill (the ones that are around the shop are fairly abused by students). I asked the shop technicians for some advice and one of them reccomended creating a jig that I can clamp the card down into. That way the back wall has nowhere to go as it is being cut (instead of how I cut it before, which left the rear surface hanging in midair).
I found a piece of aluminum scrap in the shop, and figured this was a good opportunity to learn how to use a fly cutter.

After the surface was flat (which was kind of an unnessassary operation), I cut a pocket into the middle of the block for the piece of steel to sit in (can you see my face?).

The next steps are to get some new pieces of (unbent) stainless and cut a few more parts out so I have extra. I also need to finish the jig. It needs some holes in it that I can screw some bolts and washers into to clamp down on the steel piece.